Fork and branch
Why Fork & Branch?
Let's take a step back because we're going to introduce a lot of terms and concepts in the coming section.
Remember that you are attempting add your profile card to the organization website, but you want to be able to modify our website's repository without getting in the way of regular development operations that may be going on in the repository.
You can learn more about the challenges of collaborative software development and how version control systems like Git solve them here
This isn't limited to our organization website's repository. You might want to contribute to another open-source repo or use some project's starter code as the starting point for your own.
The way we get around this in the open source world is by forking. A “fork” is an exact copy of a project where you are free to experiment and make your changes. A fork acts as a bridge between the source repository and your copy through which you can stay up to date with the source or merge your changes back into the source.
Before modifying our org repository, you'll first create a branch where you can do your work on a copy of the repository without impacting the main or master branch.
Action Items
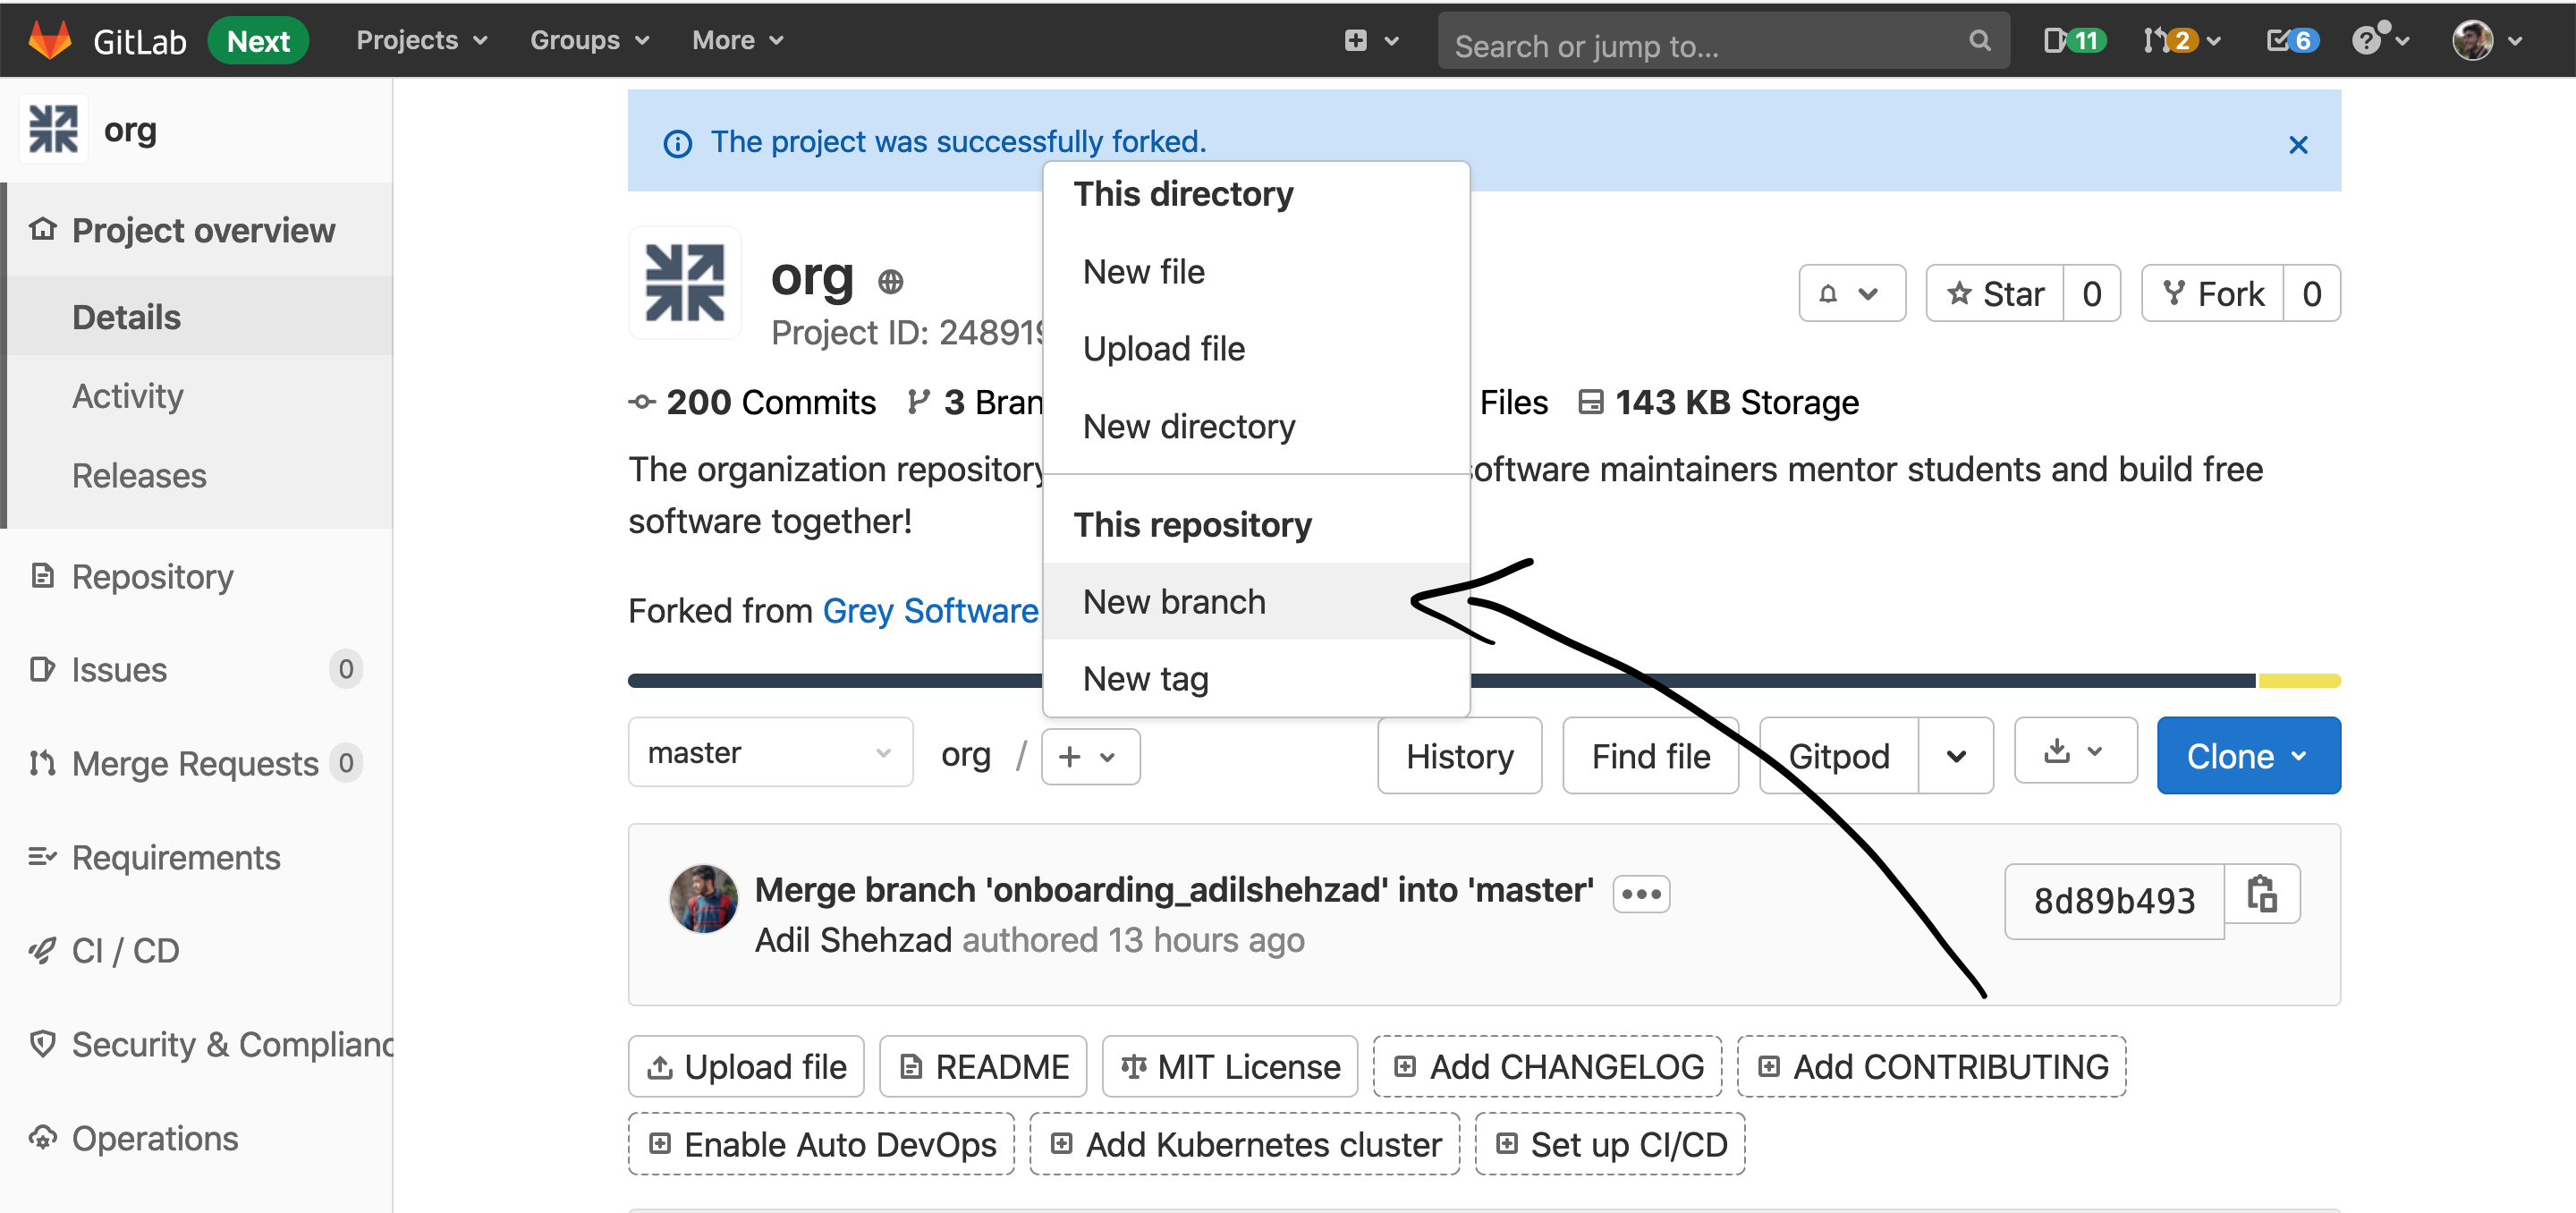
✅ Fork the repository.
Head over to https://gitlab.com/grey-software/org and click the fork button.
When you get lab asks you which name space you would like to fork the repository under your user namespace, which will be https://gitlab.com/YOUR_GITLAB_USERNAME/org

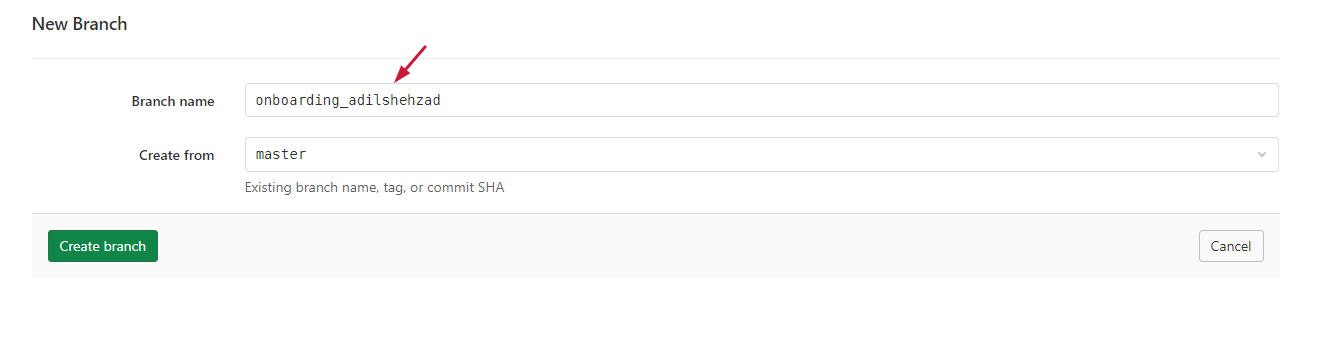
✅ Create a new branch
You will use this branch for your onboarding work inside of your fork.
Name your branch as follows: onboarding_ + Your_Gitlab_Username